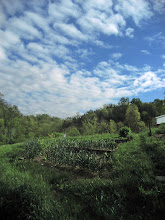
Yesterday, I put the finishing touches on our little hoop house. It is made of used lumber from our land, wood from dumpsters, new cattle panel fencing (for the structure), used irrigation tape and hoses, and new plastic.
With this tunnel, we can start seedlings, and extend the season by planting early or planting late. A hoop house collects and traps solar heat. There is nothing heating this house but the sun.
Below are some detailed images for those interested. This entire 10 x 30 tunnel was constructed for about $250.
 Inside the house, we've put down a mulch path and a nice layer of compost. The mulch was given to us by the utility company, who dumped huge loads of it on our land when they were trimming trees on our road. The compost is from a company that blends yard "waste" from Lexington with horse manure and straw from thoroughbred farms.
This is a good view of the cattle panels. We used eight of these fence-building panels to build the structure of our tunnel. They were easy to bend, and we simply attached them to large boards that are anchored in the ground a bit by wooden stakes.
We used one large piece of plastic to cover almost all the tunnel. It wraps around the end of the tunnel, where we attached some used irrigation line to the cattle panels to keep the plastic from rubbing on the rough edges of the panels.
Here, you can also see that the plastic is attached by a black line of T-tape...another piece of used irrigation. T-tape is excellent for this. We simply stapled through the T-tape and plastic, and into the wood.


Here's a picture of the wire we used to keep things together. It is super useful
and with a fence tool, you can twist the wire up
and connect just about anything. This is my favorite part. I had a hard time making the door flush with this design. And any crack lets in a lot of cold air, cooling the tunnel very quickly. With a hoop house, we want to TRAP heat.
 Instead of heading to the hardware store, we go to the old barn and hunt for things to use. For this, we found an old hose.
 This is a corner of the tunnel. If you look closely, you'll see a little piece of "wiggle wire", which is something used on "real" high tunnels. These pieces were salvaged from a tunnel that was destroyed in a storm.
Wiggle wire allows you to fasten plastic with a wiggly wire into a track. Here, we are using it to secure our roll-up sides. We can remove the wire, making the roll-up side loose, and we can roll it up to the level of the black T-tape to ventilate the tunnel.
See...roll up sides...Inside the plastic is a long pole made from pieces of bamboo tied together with fencing wire. We can roll these sides up and attach them from the inside with little ties.

Trouble shooting...inside the tunnel, we had some gaps where the bamboo poles didn't quite touch the ground. So I plugged these holes with a fun-noodle. Fun noodles were never really that much fun, anyway. Around here, we prefer inner tubes for floating in the river.

...Looking forward to planting leeks, broccoli, and greens!
Please don't hesitate to contact me if you want to chat about this design...
As for high tunnels in general, you can also see a USDA website at:
http://hightunnels.org/
Or the website for Au Naturel Farm at:
http://aunaturelfarm.homestead.com/
Paul and Allison are excellent high tunnel growers in western Kentucky.
Good Foods Coop, in Lexington, are currently looking for a farmer or two to provide lettuce mixes through the winter. "We could sell tons of the stuff...all you could grow..."

This looks good and informative. Any chance some of the veggies will be ready by June?
ReplyDeletenice blog
ReplyDeleteI have a friend that take a course about hydroponic he made a garden like this and the vegetables are more nutritive.Generic Viagra Buy Viagra
ReplyDelete