Friday, May 28, 2010

Another Chicken Coop: Low Cost and Portable


A few weeks ago I was visiting Fox Hollow Farm near Louisville, where I got a good look at this portable chicken house for their laying hens. The CSA farmer there, Pavel, was nice enough to send me some pictures so that I could use some of his design in a coop that I was planning to build. This house was inspiring because it is made from scraps (wood, metal roof, and irrigation line for the skids) and low-cost materials (chicken wire and a few hinges). It was also inspiring because it is movable and contained within an electric fence, which has been an idea I've wanted to bring to our farm for some time now.

And here's a pic of the coop a built. It is considerably smaller than the one at Fox Hollow. This one is designed to house around 15 chickens, and is small enough that one strong set of arms can pull it around the farm...although, like most things, its much easier with two people!

This design uses cattle panels for the hoop structure. It is made from one panel, cut in half, and fastened onto a simple frame structure made from scrap wood and chicken wire. The cover on top is an old banner from a check-cashing place (Thanks Carly Rio...I used it again!). The banner was a little unsightly, so I covered it with bamboo leaves to make the whole thing blend in with the greenery of the farm.

The coop is designed to be moved around the farm. The chickens roost inside the coop and manure is dropped onto the ground. After a little while, the coop is moved to keep the chickens from living above their own manure. With a portable chicken yard, the chickens can be used to clean up bugs, till up garden space, eat rotting fruits or vegetables...all kinds of farm chores.

There is a yard outside the coop where the chickens are contained by electric poultry netting. The netting is electrified by the same solar charger that powers the deer fence. The poultry netting is connected to a hot strand on the deer fence with an insulated ground wire, with one end wrapped into the poultry netting and the other wrapped onto a hot strand of the deer fence. So far, this system has worked well and kept predators out. I do not even close the chickens up at night...they are free to come and go into their coop as they please. This is ideal for me because they are now 3 miles away from where I live, and visiting them twice a day to open and close a coop would become quite a chore. I need a setup where I can go away for 24 hours , and sometimes a weekend, and the chickens stay fed, watered, cool, and safe.


Here's another view of the setup. Another important thing to think about here was the ability of the chickens to self regulate their temperatures. Chickens like being able to go into the shade, go somewhere cool, go out in the sun, and to dust bathe, as they please. The bamboo that covered up the banner gave them a nice little spot to catch some shade. I'm planning on giving them more bamboo structures to climb on and to find shade in.
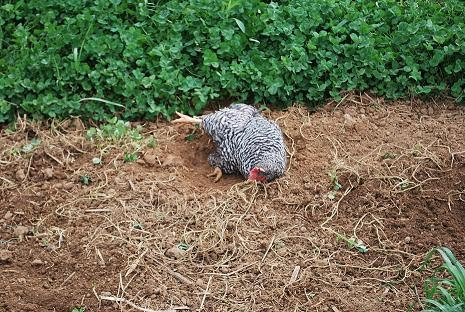

A chicken enjoys herself: a dust bath!

Wednesday, April 14, 2010

SHITAKE LOGS


Hi, this is Berea. Brian usually does the posting, but perhaps others of us will become more active. I am going to show you the shitake mushroom logs that we inoculated at the end of March.

Shitakes are one of those food items that are delicious to eat, expensive to buy, and simple to produce yourself. Take simple with a grain of salt, because I tried once before and failed completely. I inoculated during a drought year, 2005, and didn't soak my logs because I had heard it wasn't necessary. Well, now I'm pretty sure it's necessary, if the rains aren't coming your way. But I'm getting ahead of myself.

I first experienced fresh shitake eating at Sequatchie Valley Institute, in Tennessee. This is the place that all of us at Camp Pleasant have in common - I lived there a couple of summers before Adam, Brian, Melissa, and Sean all met there. It is a homestead that educates people about sustainable living systems. They had about 75 shitake logs leaned under some oak trees, next to a creek. In the mornings I would wander down to the shitake forest, cut some fresh shrooms off the logs, and saute up my breakfast with some eggs and greens. It was high class vegetarian eating. I also participated in a shitake log workshop there and inoculated my first logs. I vowed to have them in my life again. They appeal to me because they are low maintenance, last for years, and provide an intermittent supply of food - making them a good fit for a permaculture system.

Fast forward to Camp Pleasant. Although I hadn't planned on inoculating logs this spring.....It occurred to me one morning that our neighbor and friend, Mike Larimore, had some woods that might yield a couple of small white oak trees, which is a recommended type. It is also recommended to cut the trees before the leaves come out, so in early March the timing was right. For the exchange of 1/4 of our finished mushroom logs, Mike agreed. He and Sean went to his hill farm and hauled back two small white oaks, cut into 4 ft. lengths. Healthy trees are best because they will not already be colonized with other fungus, and it will take them longer to rot. Thinning out a young forest so that established trees can grow larger is a good reason to use some trees for mushroom logs.

Meanwhile, I ordered the mushroom spore and the needed implements from The Mushroom People. This is a small mushroom spore business located at The Farm, in Tennessee. Go to www.mushroompeople.com to check them out. Previously I had used "plug" spore, which are small cylinders of wood impregnated with the spore, that you tap into drilled out holes in the logs with a hammer. This time around I went with a method my neighbors Tim and Trina had been using, "sawdust" spore, which is inserted into the logs with a specialized plunger. It is supposed to be faster and cheaper than the plugs (marginally, I think). From the mushroom people I ordered 1 kg of strain MP510 spawn, which is a wide ranging variety that fruits within 6-9 months of inoculation and within a range of 55-80 degrees F. I also ordered two drill bit stoppers, and two pounds of cheese wax. These will be explained shortly.

The Mushroom People recommend inoculating the logs within three weeks of them being cut. After two weeks, on a drizzly late March Sunday, Brian, Melissa, and I set up two work stations and began. One was outside where we could drill the logs and scatter sawdust. The other was in the house close to the stove, to keep the cheese wax consistently melted. The process for inoculating goes like this: your logs should be cut to around four foot lengths, in diameters of 3-6 inches. This is so that you can easily the handle the logs as you move them around. Holes are drilled in the log to insert the spawn. For sawdust spawn, we used a 7/16 drill bit and set the depth of the bit to 1/2 inch, using the bit stopper. This is so you can move quickly and don't have to keep checking the depth of your holes. We drilled the holes beginning 3 inches down on the log, every six inches in a straight row until the end of the log. Then we moved over 2.5 inches and drilled another row of holes every 6 inches, staggering the holes so they were centered in between the holes of the first row. This gives the spawn maximum distance from the other holes. (Note: these specifics are all according to the directions given to us by The Mushroom People, and can be found easily on their website). When holes were drilled all around the log, it was ready to be inoculated.

In the kitchen, Brian and Melissa had tunes playing and were deeply concentrated on the inoculation process. When I brought them a log, first they would take the bucket of broken-up spore clumps and stab the plunger tool into it, so that it was packed in. We borrowed the plunger tool from our friends - thanks Tim and Trina! Then the plunger was lined up over a hole and compressed. If there was more spore than hole, we brushed it away so the spore was flush with the log. Then a dab of melted cheese wax was spread over the hole, to seal in the spore and seal out other fungi that might think it was a fine place to enter the log. The wax was kept in two double boiler pots that were always switched out so one could be re-melting.

While B and M inoculated, I went down to the spot we had selected for the logs to live and set up a water catchment system to soak them in. Our spot is in between a small storage shed and a steep cedar covered hillside. Evergreens are good to keep logs under because they will be constantly shaded. Melissa had seen mushrooms growing here before so we figured it was a friendly place for them. First I cleaned out the gutter on the roof; it was full of wet half-rotted leaves, which made a nice addition to the compost pile. Then I reconfigured the downspout to drain into a long steel watering trough, about 6 ft. long and 3 ft. deep. My plan for soaking the logs was to only have to carry them about six steps each way. This is important when handling heavy, wet logs.

Here is the finished result of our day's labor: 20 shitake logs, a shady place to keep them, and water tub to soak them. It has been two weeks and I have already soaked the second stack. The directions suggested soaking the logs every two weeks during the inoculation period, when the mycelium are taking over the log. This can last up to 9 months so I want soaking the logs to be as easy as possible. I'm already scheming about a larger catchment tank that will feed into the metal tub only when I'm ready to soak.....This way fresh water is always available for the soaking. The "used" soaking water is going on plants in the garden, so it has many uses before being returned to the water cycle.


This is the path through our Chickway garden. The shitakes are tucked between the shed and the hill at the bottom.


Here the logs are stacked log cabin style, to keep them off the ground and away from other fungi during the inoculation period


Close up of the log spot and water tank.


Soaking happily.

Wednesday, April 7, 2010

Drama Queens

This week, our bees arrived! A good friend, Mark Lee, is helping us along the way. He's a bee expert, an experienced tree farmer, and and all around fascinating, good guy. Melissa and Sean are doing a sort of partnership/apprenticeship: teaming up with him to keep bees at our place and our farm, process honey in Mark's certified kitchen, and help sell/trade the honey! Melissa met Mark while doing bee research for the University, and now their relationship has evolved to get us into the "beesniess". Oh, my.


Here Mark is helping Sean with the bee delivery. We got 5 hives for our Camp Pleasant land and 5 hives for the farm. They come in the small boxes that Mark has set in front of him, and they are then put into the frame boxes on the left.


Melissa dumps the bees into their new home! Some people might not believe it, but if you are calm and peaceful, the bees have no troubles with you and will not sting you.


Melissa, whose name literally means "bee", beams as she holds a small box with a queen bee.


And Sean shows off his favorite drone.

The bees at the farm were happily foraging on the fields of dandelion the next day. But some drama insued at Camp Pleasant, where one queen "escaped" from the hive and the swarm followed her! Melissa tries to find the queen, which is just a bit larger than the drones and worker bees:


When the queen is nowhere to be found in the box, its assumed that she is nestled on the crate, in a big pile of buzzing bees. Melissa tries to capture the pile of bees:


At this point the bees are a bit confused about what is going on, and buzzing wildly all around us. I had never been in anything like it! Its like you are in another world, ruled totally by the buzzing group movement that is the hive. Its really exhilerating.
When the attempt to move the queen didn't seem to work, the hive box was set right next to the little swarm, with hopes that the queen would enter the hive again and the drones and workers would follow:

Later in the day, Mark came over and helped move the queen into the hive, by hand. So far, so good: all the queens are home and safe, and the workers are out foraging the spring wildflowers and trees. Never a dull moment. . .!

Making Compost Tea in a Rain Barrel

First off, rain barrels. There are many good reasons to catch rain. Water is useful, obviously. It also costs money. Rainwater can be used for many things, and of course, its totally free. Gutters that are currently used to divert water away from things can simply be used to divert water into catchment systems. We have friends that live without city water, living off rain water, caught from roofs and purified with simple countertop water filters. They have water when there's a drought, and they have water when the water line bursts and the rest of us are waiting for the city to fix it! They have fairly developed, clean, reliable systems. Ours is rudimentary.

I like to use rainwater in gardens as a substitute for using tap water. (Tap water contains chlorine, which is toxic to many soil microbes.) I also like the idea of building ponds to create places for frogs and fish. The permaculturalists remind us that water is moving through the land, so why not play with it a little as it passes by? Why not use it, store it, purify it, grow things with it, grow things in it. . .

Below is a pic of our first, simple rain barrel that Sean and I built last year. Its made from a 55 gallon plastic drum with the top cut off of it. The gutter simply empties into it at the top. At the bottom of the barrel is a fixture that has a garden hose attached, so we can water the garden out of the barrel when it is full. At the top of the barrel, the black tube is fixed and serves as an overflow. When it rains, the barrel fills up quickly, and the overflow is diverted to a pond in the garden and to other barrels for more storage and garden watering. (We have had to attach a screen to filter the debris from the water coming from the roof...)
It works well in the summer. In the winter, the water freezes and becomes a massive block of ice. Its not a terrible problem, but it could potentially burst some of the fixtures...

The overflow pond, just after being installed last year:


Secondly: Why compost tea? Compost (and/or manure) tea is a way to fertilize soils and plants. If watered with it, the soil and plant roots are given a good serving of nutrients, and if sprayed on, the leaves of plants can also be feed, called "foliar feeding". If compost tea is allowed to brew for a day or two, the beneficial microbes in composts (fungi and bacteria) can proliferate and then be spread into your gardens. Some people even "feed" compost tea molasses so that the microbes will populate quickly.


So here's how we do it: a simple bamboo frame is constructed that sets on top of our rain barrel. An old pillow case is filled with composts and manures, tied at the top and hung from the frame. Its basically like we are making a massive cup of tea, hence the name. It sits like this, brewing, for 1-3 days before we use it. You can do smaller batches in 5 gallon barrels in the same manner.


When I walk by, I like to take an old bamboo pole and stir/swish the water around. It helps mix the compost and tea in with the water as well as introduce oxygen to the brew, which helps good microbes grow. When we are ready to use it, we simply open the garden hose at the bottom of the barrel, and fill up our watering cans. If I am going to spray the tea onto plants or land, in a backpack sprayer, I'll attach a small piece of cloth over the end of the hose to filter out any debris, so the sprayer doesn't get clogged.

There's a massive amount of effort that people are putting into developing compost tea brewing and application methods that you can read about. For now, we keep it simple, but you are free, of course, to get crazy with it!

Starting Sweet Potato Slips


We love sweet potatoes. They are nutritious, sweet, versatile, and easy to grow. We are still eating last year's sweet potatoes, which we keep packed in dry hay, in cardboard boxes, in our kitchen. Our favorites are sweet potato hash browns, simple baked sweet potatoes, and sweet potato muffins! The chickens like sweet potatoes, too.
Starting your own sweet potato slips is easy. All you need are a few sweet potatoes, a space to keep them warm, and some soil or sand to cover them up with. You can get a LOT of fresh, healthy shoots for transplanting without a lot of effort. Your shoots can be much nicer than the bunched sweet potato slips you often see at garden centers in spring. And besides, they usually sell out before most of us can get any, anyway! So here's how we do it:


Our process starts around late March, about 8-10 weeks before we will be transplanting. We start our sweet potatoes in our hoophouse, a 10X30X6' single-layer plastic tunnel. In the above picture, you can see how we start them; we set a small wooden box frame (just four walls) down into the soil, and set the potatoes in the bottom.

These potatoes are two different varieties. One variety is the organic sweet potatoes from our local coop, and the other, called Mahon, is from a friend and heirloom enthusiast, Rodger Winn. According to him, it is "the" sweet potato to grow. You can find more about him at www.rodgersheirlooms.com


Next we cover the sweet potatoes with about 6-8 inches of sand or soil. For the next few weeks, we just keep the sand (or soil) warm (65-85 degrees is good, but warmer is better), and moist. The sweet potatoes will send shoots up that will emerge out of the sand and put on leaves. When we are ready to transplant into the field, (which is hopefully when the shoots have a good 4-6 inches of leafy growth, we simply dig up the tubers and shoots. Each tuber will have 10-20 sweet potato "slips" that we can plant and that will become their own sweet potato plant! Since the shoots had to emerge through 6-8 inches of sand, they have a long, rooty section that helps them get established in the field. We simply snap off each shoot from its tuber, and transplant it into the field. As always, it is essential to keep the transplants moist for their first few days.


An old window provides an extra layer of heat on those cooler spring days. Sweet potatoes need warm temperatures to put on new shoot growth, so don't be afraid to heat them up to 85, even 90 degrees. I tend to keep the window open a bit just so it doesn't get too hot on a sunny day. If the night is going to get too cold, I make sure to cover the window and box with a heavy blanket late in the day, before the sun goes down, to hold in heat through the night.

Friday, April 2, 2010

The Organic Association of Kentucky

In January of 2009, some of us who were working at Kentucky State University had an idea to get people together to explore the creation of an organization dedicated to organic agriculture in Kentucky. It came from the University perspective; we thought we needed an organization that could help guide research priorities for research and extension agents.

That January, a modest but empowered group of farmers, grocers, nursery people, University workers, and Kentucky Department of Agriculture folks got together and agreed the idea was a good one. A steering committee was formed, and for the next year, the Organic Association of Kentucky, or OAK was crafted.

In January of 2010, the first official meeting was held and a board was formed. It was exciting for me. I had just left the University to farm full-time and was asked to serve on the board. I figure its a great opportunity to be a part of an organization that is sure to go somewhere.

OAK Board (clockwise from top left): John Bell, Brian Geier, Jake Schmitz, Tony Powell, Larry Brandenburg, Shayne Wigglesworth, Kim Jordan, Deborah Hill, Molly Stotts.

We have had our first few meetings. Right now the priority is to build the membership. We have about 80 members now and hope to grow a lot in 2010. Within the next few weeks we'll be distributing our first newsletter. We hope to use the newsletters, farm tours, and events to build the membership, and to culminate the year in a conference for organics in Kentucky this winter.

You can learn more about what OAK is up to at its website: www.oak-ky.org Members can access forums there to chat about issues, ideas, bulk buying, etc.

The post below this one is an article I wrote for the OAK Leaf, our newsletter.


Thoughts on Soil Fertility

What makes soil fertile? How can my soil provide what a plant needs? Andwhat can I do to make sure this happens this year? These questions fill our house in spring, as winter’s farming ideas start to take shape.
There’s a tendency these days to take the quick and easy route.  If
there’s a question or a problem, we want an answer or solution. We want
it now, we want it here, we want it cheap, and it helps if we can pick up
some soda and dog food while we’re at it. The “conventional” way of going
about soil fertility (which isn’t really conventional, given it’s only
decades old) is to send a soil sample to the University, get a read-out of
nutrient deficiencies, and accept a recommendation for how many pounds of
10-10-10 to apply. It’s here, it’s now, and it’s cheap.

Many people understand the problems of this kind of thinking when it comes to farming. While lab tests may show
certain nutrients are needed, and synthetic fertilizers may make a plant
green, we sense there is much more to soil than a read-out of nutrients,
and that there is no synthetic substitute for a healthy, living soil.

But there are a thousand ways to go from there. Hit the books, and you’ll
find hundreds of takes on soil fertility. Talk to farmers, and you’ll
hear a different perspective from each one you ask. Surf the internet and
find more information than your eyes should handle.

A few broad concepts they all seem to agree on: organic matter, cover
crops, manure and composts are good. Plants need certain nutrients, and
soils need to be balanced. Biodiversity is key, and reduced, careful
tillage is essential. But what do these broad concepts mean for me, when
it comes time to start making decisions about what to do in 2010?

This isn’t a sob story, but ultimately, when making decisions on the farm,
we are terribly alone. Sure, there are broad concepts, but no one has
faced the decisions I am making, about this farm, right now. The
following is a discussion of some of the ideas and experiences that form
the basis for my soil fertility decisions, for what it’s worth...

This year I “upgraded” from the University soil tests and coughed up the
$25 for a “better” soil test that contained things like organic matter
content, estimated Nitrogen release, cation exchange capacity, and percent
base saturation for Potassium, Magnesium, Calcium, and Sodium. If that
sounds a little involved to you, that’s because it is. Trying to figure
out the science of your soil given the tests available isn’t the easiest
homework assignment there is. I’ve heard tales of farmers who could chew
on a tiny bit of soil and tell you what needed to happen based on taste
and feel. If you know of one, tell them to call me, by all means.

As I tried to interpret these test results, a few things stuck out. There
were deficiencies in a few nutrients (Boron, Zinc, Copper, and Magnesium),
and the “percent base saturation” of Potassium, Magnesium, Calcium and
Sodium were less than ideal. A few weeks earlier I had heard a popular
Biodynamic farmer, Jeff Poppen, aka “The Barefoot Farmer” (and author of
the book by the same name), mention that you want a certain relationship
between levels of Potassium, Magnesium, Calcium, and Sodium. And a book
by Gary Zimmer, “The Biological Farmer”, validated this idea. (Both books
I highly recommend.) By this point I accepted that my soils are
deficient in some nutrients and that the high “base saturation” of Calcium
and Potassium may contribute to a Magnesium deficiency.


What do you do when a soil is deficient or imbalanced? The Biological
Farmer’s perspective suggests supplying any limiting nutrients, in part,
with rock applications based on soil tests. Greenview Farms Coop in Ohio
helped me develop a custom mix based on my soil tests. For three acres
it contains: 500 lb of a mix of several kinds of rocks (sulphate of
potash, magnesium sulphate, boron, zinc, and copper), to supply limiting
nutrients, humates (plant deposits that are almost coal) for humic acid
to improve soil structure and feed microbes, molasses to feed microbes,
kelp (seaweed) for minerals and nutrients, and beneficial bacteria and
fungi. All in all, about a $150/acre treatment, for those of you keeping
track.

Now I don’t know about you, but I’m constantly striving to reduce inputs
and costs, and I’m well aware of the dangers of relying on industrial
systems that use a lot of energy. I wrestle with this idea that my farm
“needs” to import rocks from Utah, or that it relies on mining and
pulverizing that uses massive amounts of energy. Isn’t there an on-farm
or local alternative? Maybe in time these answers will come. For now,
this is just “where we’re at”: farms that aren’t yet ideal, plenty of good
questions, and lots of work to figure them out.

To complicate things, I have questions surrounding application techniques.
When is it best to apply rocks, humates, and microbes? Before a rain or
in the sun? Just before you till or onto a growing cover crop? Waning or
waxing moon?!? Members of the Greenview coop suggested, “As soon as
possible right onto the cover crop. The cover crop will take up the
minerals and if tilled in as a green manure, it will be cycled back into
the soil.” Makes sense. But when I started spreading, something didn’t
seem right. Leaving the microbes and rocks baking in the direct sun
seemed wrong. Fearing a waste of money, I decided to try another method.
Philip Lyvers (of Lyvers Farm, a 2,600 acre hog operation in Kentucky
integrating Biodynamic practices into a conventional system) suggested
that any fertility inputs be “buffered” with compost. My interpretation
is this: the ideal farm uses on-farm compost from animals and materials on
the farm. This stimulates a build-up of microbes in composts that is well
adapted to your soils. By putting mineralizing materials into the
compost, you “introduce” the composts to the rocks and increase the rate
and potential for the rocks to act on your soils. Considering Philip’s
farm hasn’t gone the way of almost every other hog producer in Kentucky
(he’s still farming), I figure there’s a good chance his advice is solid.
So I will be adding about 1/3 of the rock mix to composts and adding that
mixture just before spring tillage.

Speaking of compost and microbes, plants need more than just a balanced
soil; they need a live soil high in microbial life and organic matter.
Sounds simple enough. But again, how do I make decisions that will
support soil life and organic matter?

For instance, we hear that green manuring is a good idea. By
incorporating cover crops into the soil, we can increase soil organic
matter and feed soil microbes. And yet we also know that tillage is
destructive. With each tilling of the soil, microbial populations
drastically drop and some even vanish from our topsoil. A friend asks:
“If tillage is bad, then why till in a cover crop? Why not just cut it
and allow it to mulch on top of the soil?” Good questions. No-till
proponents say to leave the roots undisturbed; if you can kill the cover
crop with mowing or crimping and leave the root zone undisturbed, those
roots die and leave all their exudates and microbial allies in the soil
for your next crop to utilize. Tilling would only wreak havoc on these
fragile, important organisms. Other people may point us toward studies
that show that incorporation of cover crops increases organic matter and
microbial diversity more than no-till strategies. Ultimately the decision
to till or not to till depends on many factors, and each of us must weigh
those factors independently.

Similar questions arise with animal manures. It is well-known that animal
manures are a good thing for soils. (Although I’ve read that some vegans
have taken up gardening/farming and are working on systems that use no
animal manures or confined animals of any kind.) In my mind, the “ideal”
farm puts animals and crops together, and fertility needs of the crops are
met with the manures of the animals (including people). But let’s look
again at “where we’re at”. Many folks just raise animals, and many just
raise plants. And human-based compost (“night soil”) has been blacklisted
for the moment. Of those of us who raise crops and livestock, few, if any,
are providing all their own fertility and feed needs. Luckily, it’s easy
to find folks who have a barn they are happy to have cleaned, and I can
truck in load after load of horse, sheep, rabbit, cow, chicken...all sorts
of great poo. I’ve trucked enough loads of manure that upon arrival, one
farmer exclaimed “it’s the Great Poo Guru!” (that’s a compliment to me).
Indeed, picking up poo is one of my favourite neighbourly activities. But
it takes a lot of time and energy. I truck by cows dropping manure right
there on the fields of other farms, and I marvel at the simple efficiency
of grazing livestock. At a certain point, trucking manure no longer makes
sense. Gas is expensive, pitchforks are small, and an unknown poo can
have any number of residual toxins.

Another organic option for adding animal manures are “granular” products:
composted and pelletized manure, bones, and blood from slaughterhouses,
and grease from dumpsters, among other things. They are fairly cheap,
easy to handle, and potent. Of course, we are supposed to overlook the
inter-dependency we then have with large, industrial slaughterhouses and
food chains, as well as any toxins that can pass through their processing.
Some suggest we are doing a service by using wastes; others suggest that
the horrors of industrial meat production can only exist if organic
farmers keep buying those wastes. Whatever floats your boat. I say it’s
alright to use such products to build a farm, and while we should strive
for an ideal that moves beyond it, we should support evolving farmers
wherever they are.

When thinking about manures, I always return to that ideal farm, where
crop needs are met by animals and animal needs are met by crops. As I
haul loads of manure, I am well aware of the path that must be taken;
with each passing season it becomes clearer to me that I need to raise
more than chickens! If there’s one thing I know, it’s that sometimes
you have to stop looking for what you want and just create it.

A mixture of manures, composts, and cover crops can increase soil
biodiversity and fertility. What seems less utilized is a biodiversity of
plants (with the exception of cover cropping and pasturing) in order to
build healthy soils. For instance, some say certain plants can root deep
into sub-soil, pull up nutrients, and distribute them into topsoil. But
how many of us celebrate dandelions and docks, or encourage nettles and
comfrey? Perhaps the answer to our reliance on industrial rock mining and
slaughterhouses lies, in part, in building relationships to these dynamic,
“bio-accumulating” plants.

A living soil needs sources (manures and plant residue), and it also needs
protection from toxins and tillage. I feel little need to discuss the
dangers of using toxins when it comes to soils, but I do want to talk
about tillage. In our vegetables, we are establishing semi-permanent
pathways of clovers and grasses that are mown instead of cultivated, and
can remain undisturbed for several seasons. Even as we till the beds
where we plant, we are allowing these strips to (hopefully) become places
of respite for beneficial fungi and bacteria, which can then repopulate
the beds following tillage. After several seasons the beds and pathways
can simply be switched. This semi-permanent pathway system creates a
multi-year cover crop before a bed is integrated into a production
rotation. I think it is a system for people with limited land (or rent
money) to have more cover crop and less tillage. Additionally, to push us
to develop new ideas, roughly 1/10 of our production areas are hand-tool
based, no-till farming, where we are experimenting with vegetable and
grain production without the use of machines. I call this kind of farming
“worm-till” farming to differentiate it from large-scale,
herbicide-intensive no-till systems. “Earthworms make the best tillers,”
Susana Lien once told me. And after seeing her farm (Salamander Springs,
near Berea) flourish on mountainous clay, I have to integrate that idea
with some sincerity.

Farming is simple and complex. Simple in that farmers need only observe
and mimic nature as much as possible: be diverse, balance animals and
plants, cycle things endlessly, need few/no inputs, and always cover the
soil. And yet farming is so complex! No two farms are alike. Each farmer
has a different set of resources, every family a different level of needs,
and each farm a different relationship to a society that is changing with
lightning speed. Farmers are jugglers, integrating broad biological
concepts and definitive economic and environmental realities with the
humilities of one plot of land. I am convinced that there are no easy
answers in farming, only really good questions. It is ultimately up to us
to move forward and incorporate the good questions.

Ultimately it is time that will bring us to a sustained, thriving farm
community. Time farming. Time living with a real dependence on our soil,
for income and sustenance. Time walking our fields in meditation and
observation; fertilizing with the proverbial “farmer’s footsteps”. Time
adapting to the future. In time, we will do our best to pass on our
experiences, our questions, and our farms to a generation that can do the
same, and all along the way, things will continue to get right.

Friday, February 5, 2010

Low-Cost Seed Germination House

If you were to look at all the postings on this blog, at the beginning of each one there is a statement about how long it has been since the last, along with a hopeful declaration that there will be more postings in the near future. This one is no different! A LOT of time has passed, but I remain hopeful that this blog will soon take off with a buzz of springtime activity.

A friend of mine, Gary Millwood, sent me a link a few weeks ago with some helpful hints on using a light strand from the hardware store to create the heat needed to get seeds germinating indoors for early transplants. These strands are lights people generally use to stretch along walls, stairs, or other surfaces, and to cast a neat glow indoors. Here's one of the strands, running on top of a piece of cardboard, inside a crate that we're using to start seeds in:


Here is the basic idea: you find a crate or large tupperware container large enough to set a flat of seedlings in. You cut some holes near the bottom that are large enough to thread the light strand into it. Next, find some sand. We are lucky enough to have the Elkhorn creek nearby, which blesses us with sand deposits as it winds its way through the farms and forests of northern Franklin County. Our sand is dark and contains a lot of little creature's shells. (We're taking extra sand to add to our compost piles.) Here's what it looks like:

Next step: add a layer of sand about 4-5 inches deep at the bottom of the crate or container, burying the light strand as you go. I use about 4-5 feet of strand for a container that will heat one flat of seedlings. Next, insert your seedling flat into the sand, nestling it down into the sand so that the cells of the flat are somwhat buried. The lights will slowly heat the sand, then the seedling flat, its potting soil, and your seeds. Last night when I set this one up, the sand and soil were a cool 50 degrees, and within an hour the soil had warmed to 65+ degrees...just warm enough to germinate many garden seeds. My hunch is that by using more feet of strand per container you may be able to reach 75 degrees or higher, which would be ideal.


You can get these light strands in several different lengths, and they can plug into one another to create any length you desire. I bought a 24 foot strand that was around $30, and am able to use it in three containers simultaneously to germinate three flats of seeds. The crates we have are handy because they can stack on top of one another without stacking INSIDE each other, and so a flat of seedlings can fit in one while another container sits on top of it. This 24 foot strand is stretching into these three containers, and the containers can be stacked so they don't take up too much space in the house!

Thanks, Gary!